A little blast from the past here. Several years ago I built something very like a Google Street View car to gather data for my PhD thesis. At the time I wrote up a blog post about the experience, as a guide for anyone else who might want to build such a thing. But I never quite finished it. Upgrading WordPress today, I came across this old post sitting in my drafts folder from years ago, and decided to rescue it. So here it is. The making of a DIY StreetView car.
Background
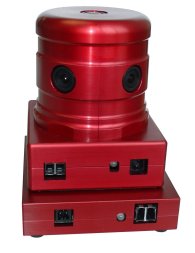
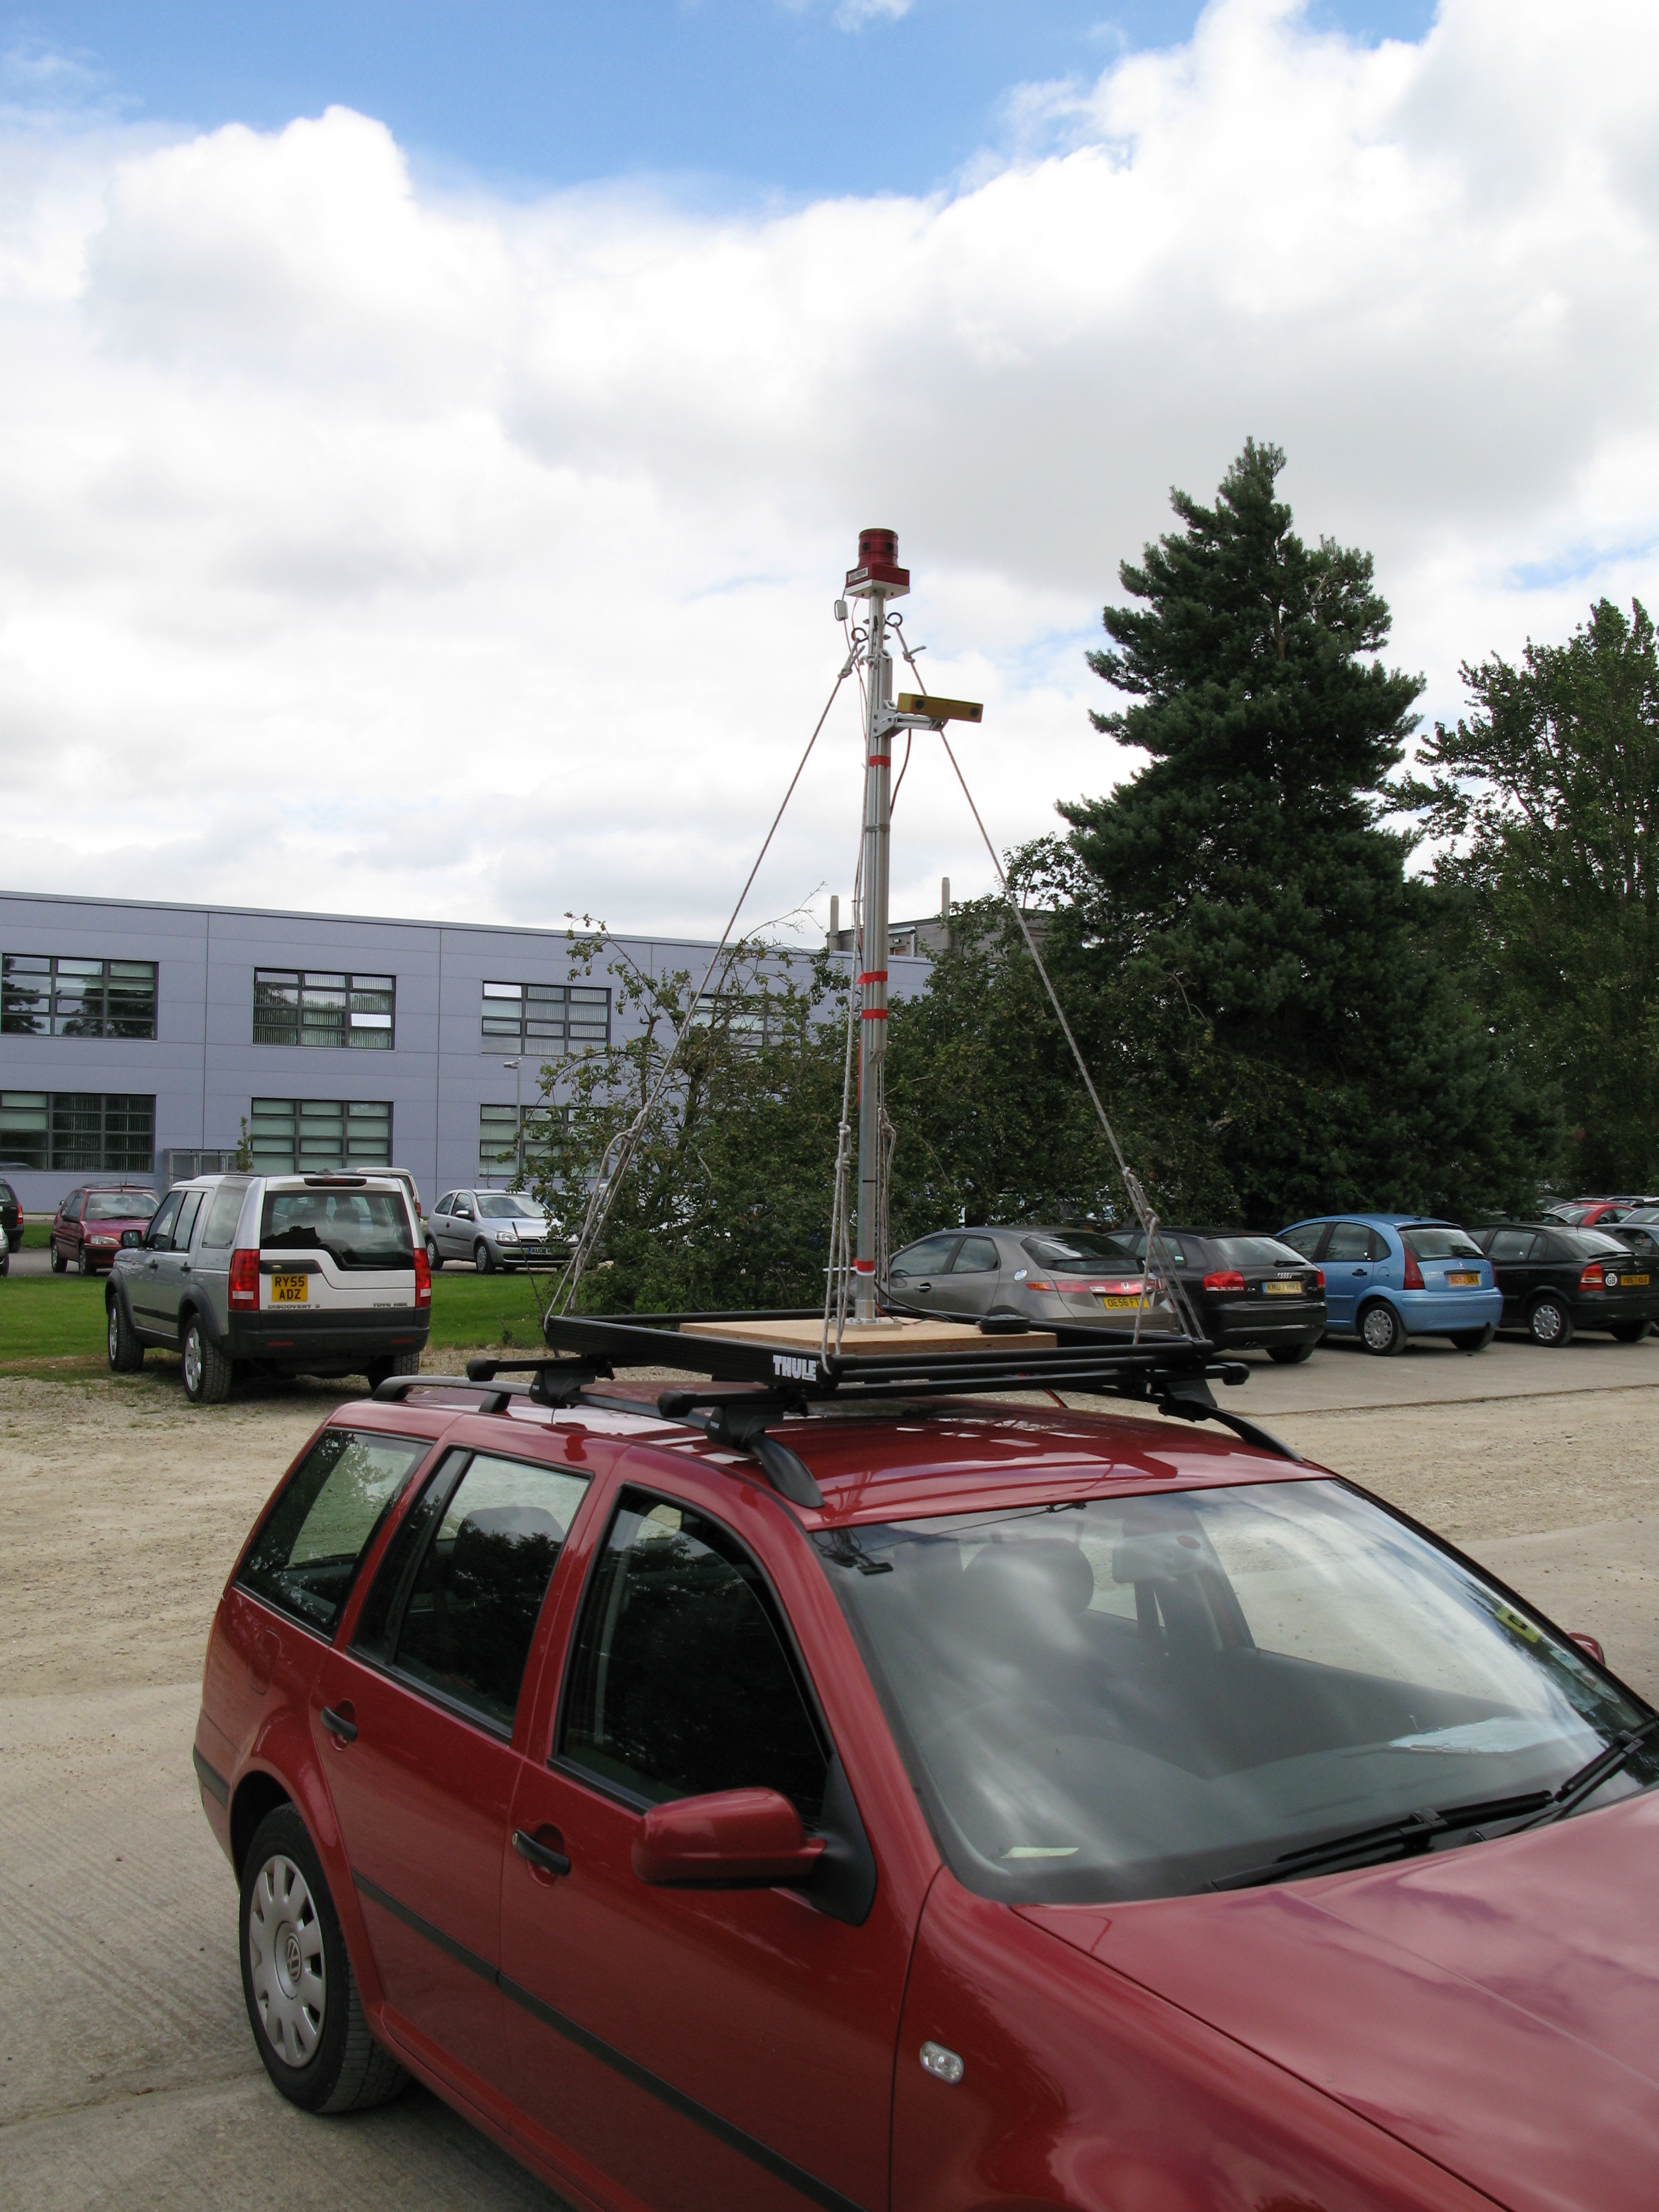
In an earlier post, I talked about some results from my thesis on place recognition over a 1,000km route. One of the most difficult things about the experiment was building a system to simply collect the data. It’s considered a bit low-brow to discuss such trivial matters in academic publications, so the months of work involved merited exactly zero lines in my thesis. For interested hackers out there, I thought I would write a blog post on what’s involved in making a home-brew version of a Google Street View car. For your labours, this is what our end result looked like:
Step 1: Let’s Do the Simplest Possible Thing
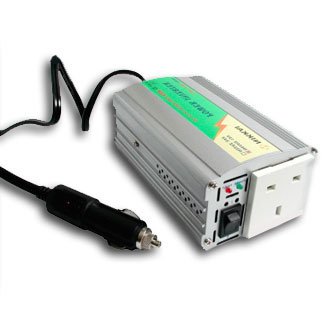
Building an initial prototype system was actually pretty easy. We already had a Point Grey LadyBug2 and a GPS on a robot in our lab. To take this system driving, we just bought a small-form-factor PC to sit in the car, a 150W cigarette-lighter inverter for power, and a roof rack to mount the whole system. Add some simple sensor mounts we built in the machine shop, a little software glue to trigger photo capture based on GPS , and you’re ready to go driving. In a week or so, we had a system that could capture StreetView around the block. We didn’t even own a car, so we rented one. In fact, the hardest part of this whole thing was trying to get the car rental company to give us a car that worked with the roof rack we had bought, without letting slip what we planned to do to their car.
Step 2: Well, We Actually Also Wanted…
In less than two weeks, we had a simple system that worked once around the block. After looking at the initial data, we decided that in addition to the omni-directional imagery from the LadyBug2, it would be nice to have forward-facing stereo imagery. The omni-directional data was being collected for an experiment on place recognition. Adding the stereo imagery would allow us to also use the data for work on visual odometry and SLAM as well. So we modified our setup to include a Point Grey Bumblebee stereo camera.
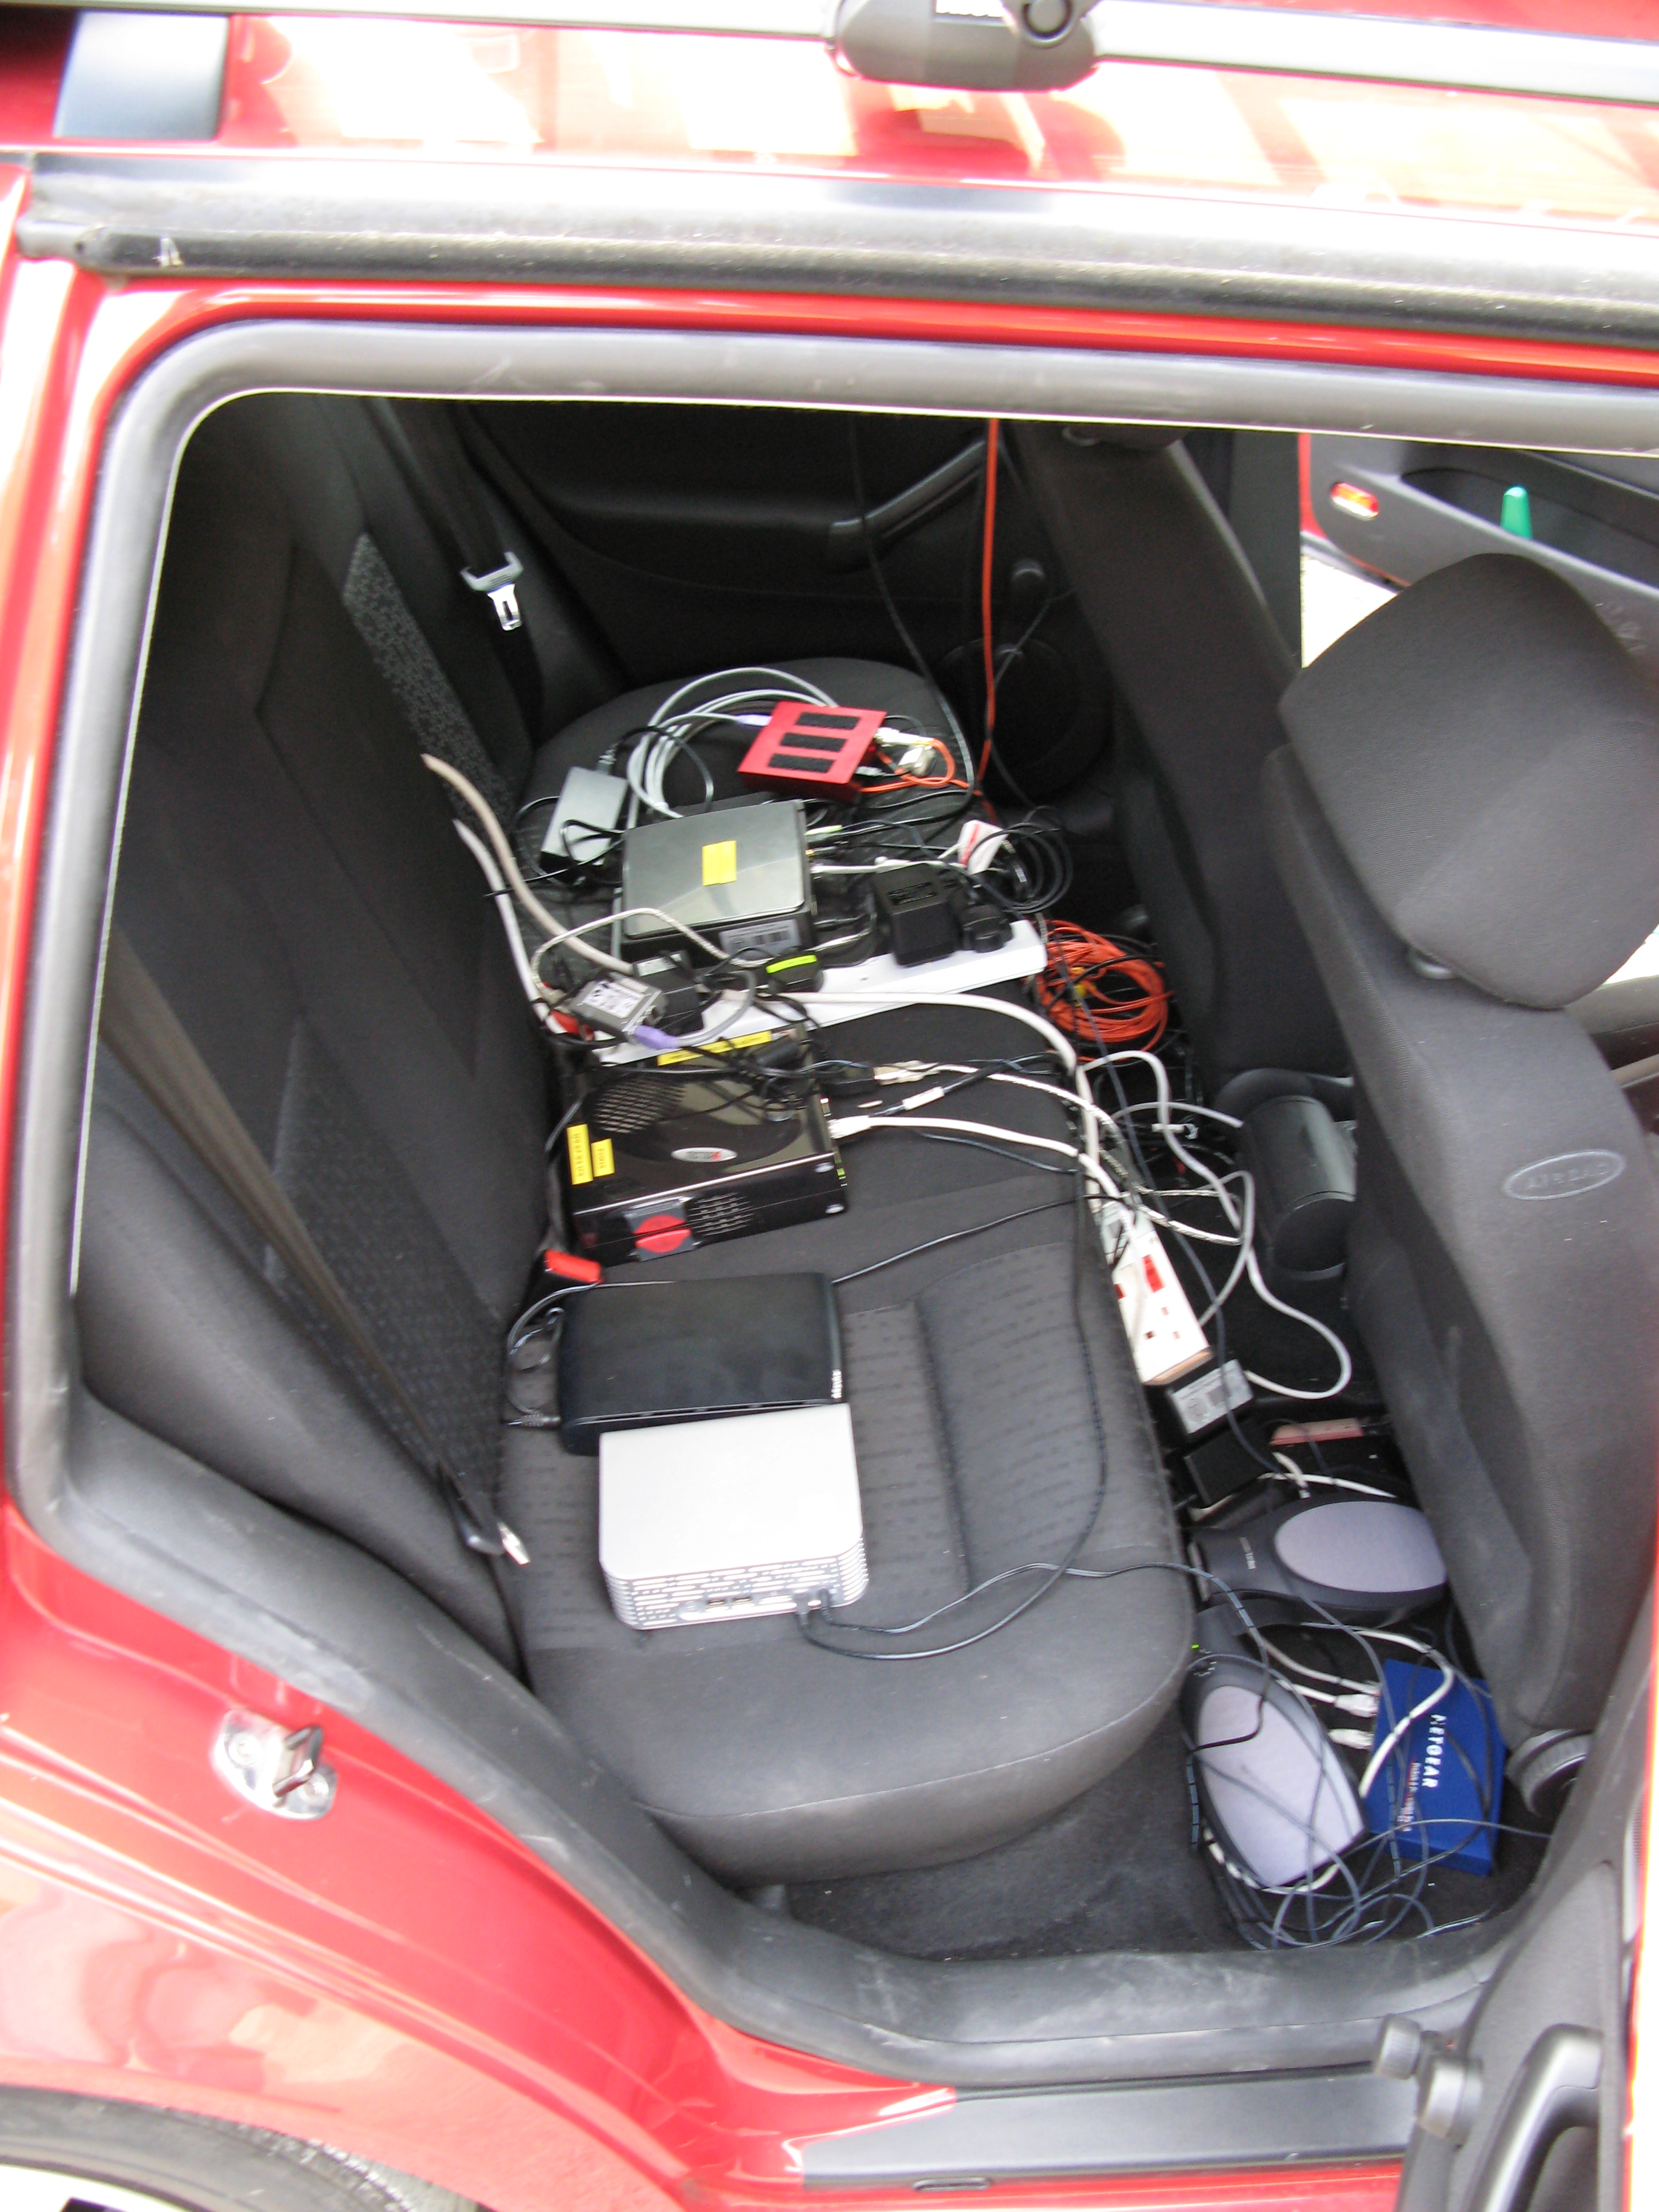
Adding an extra camera forced us to redesign the system. To get enough disk bandwidth to log the image stream from both cameras, we now needed two PCs in the car. As soon as we had two PCs, the power requirements roughly double and this forces some big changes.
Power is a major practical hurdle. You can draw about 150W from the car’s cigarette lighter socket. It’s a lovely and simple solution, but not enough to run more than one computer. Also, it was a pain to have the system go down if you turned off the engine (or if I, *ahem*, stalled the car at traffic lights).
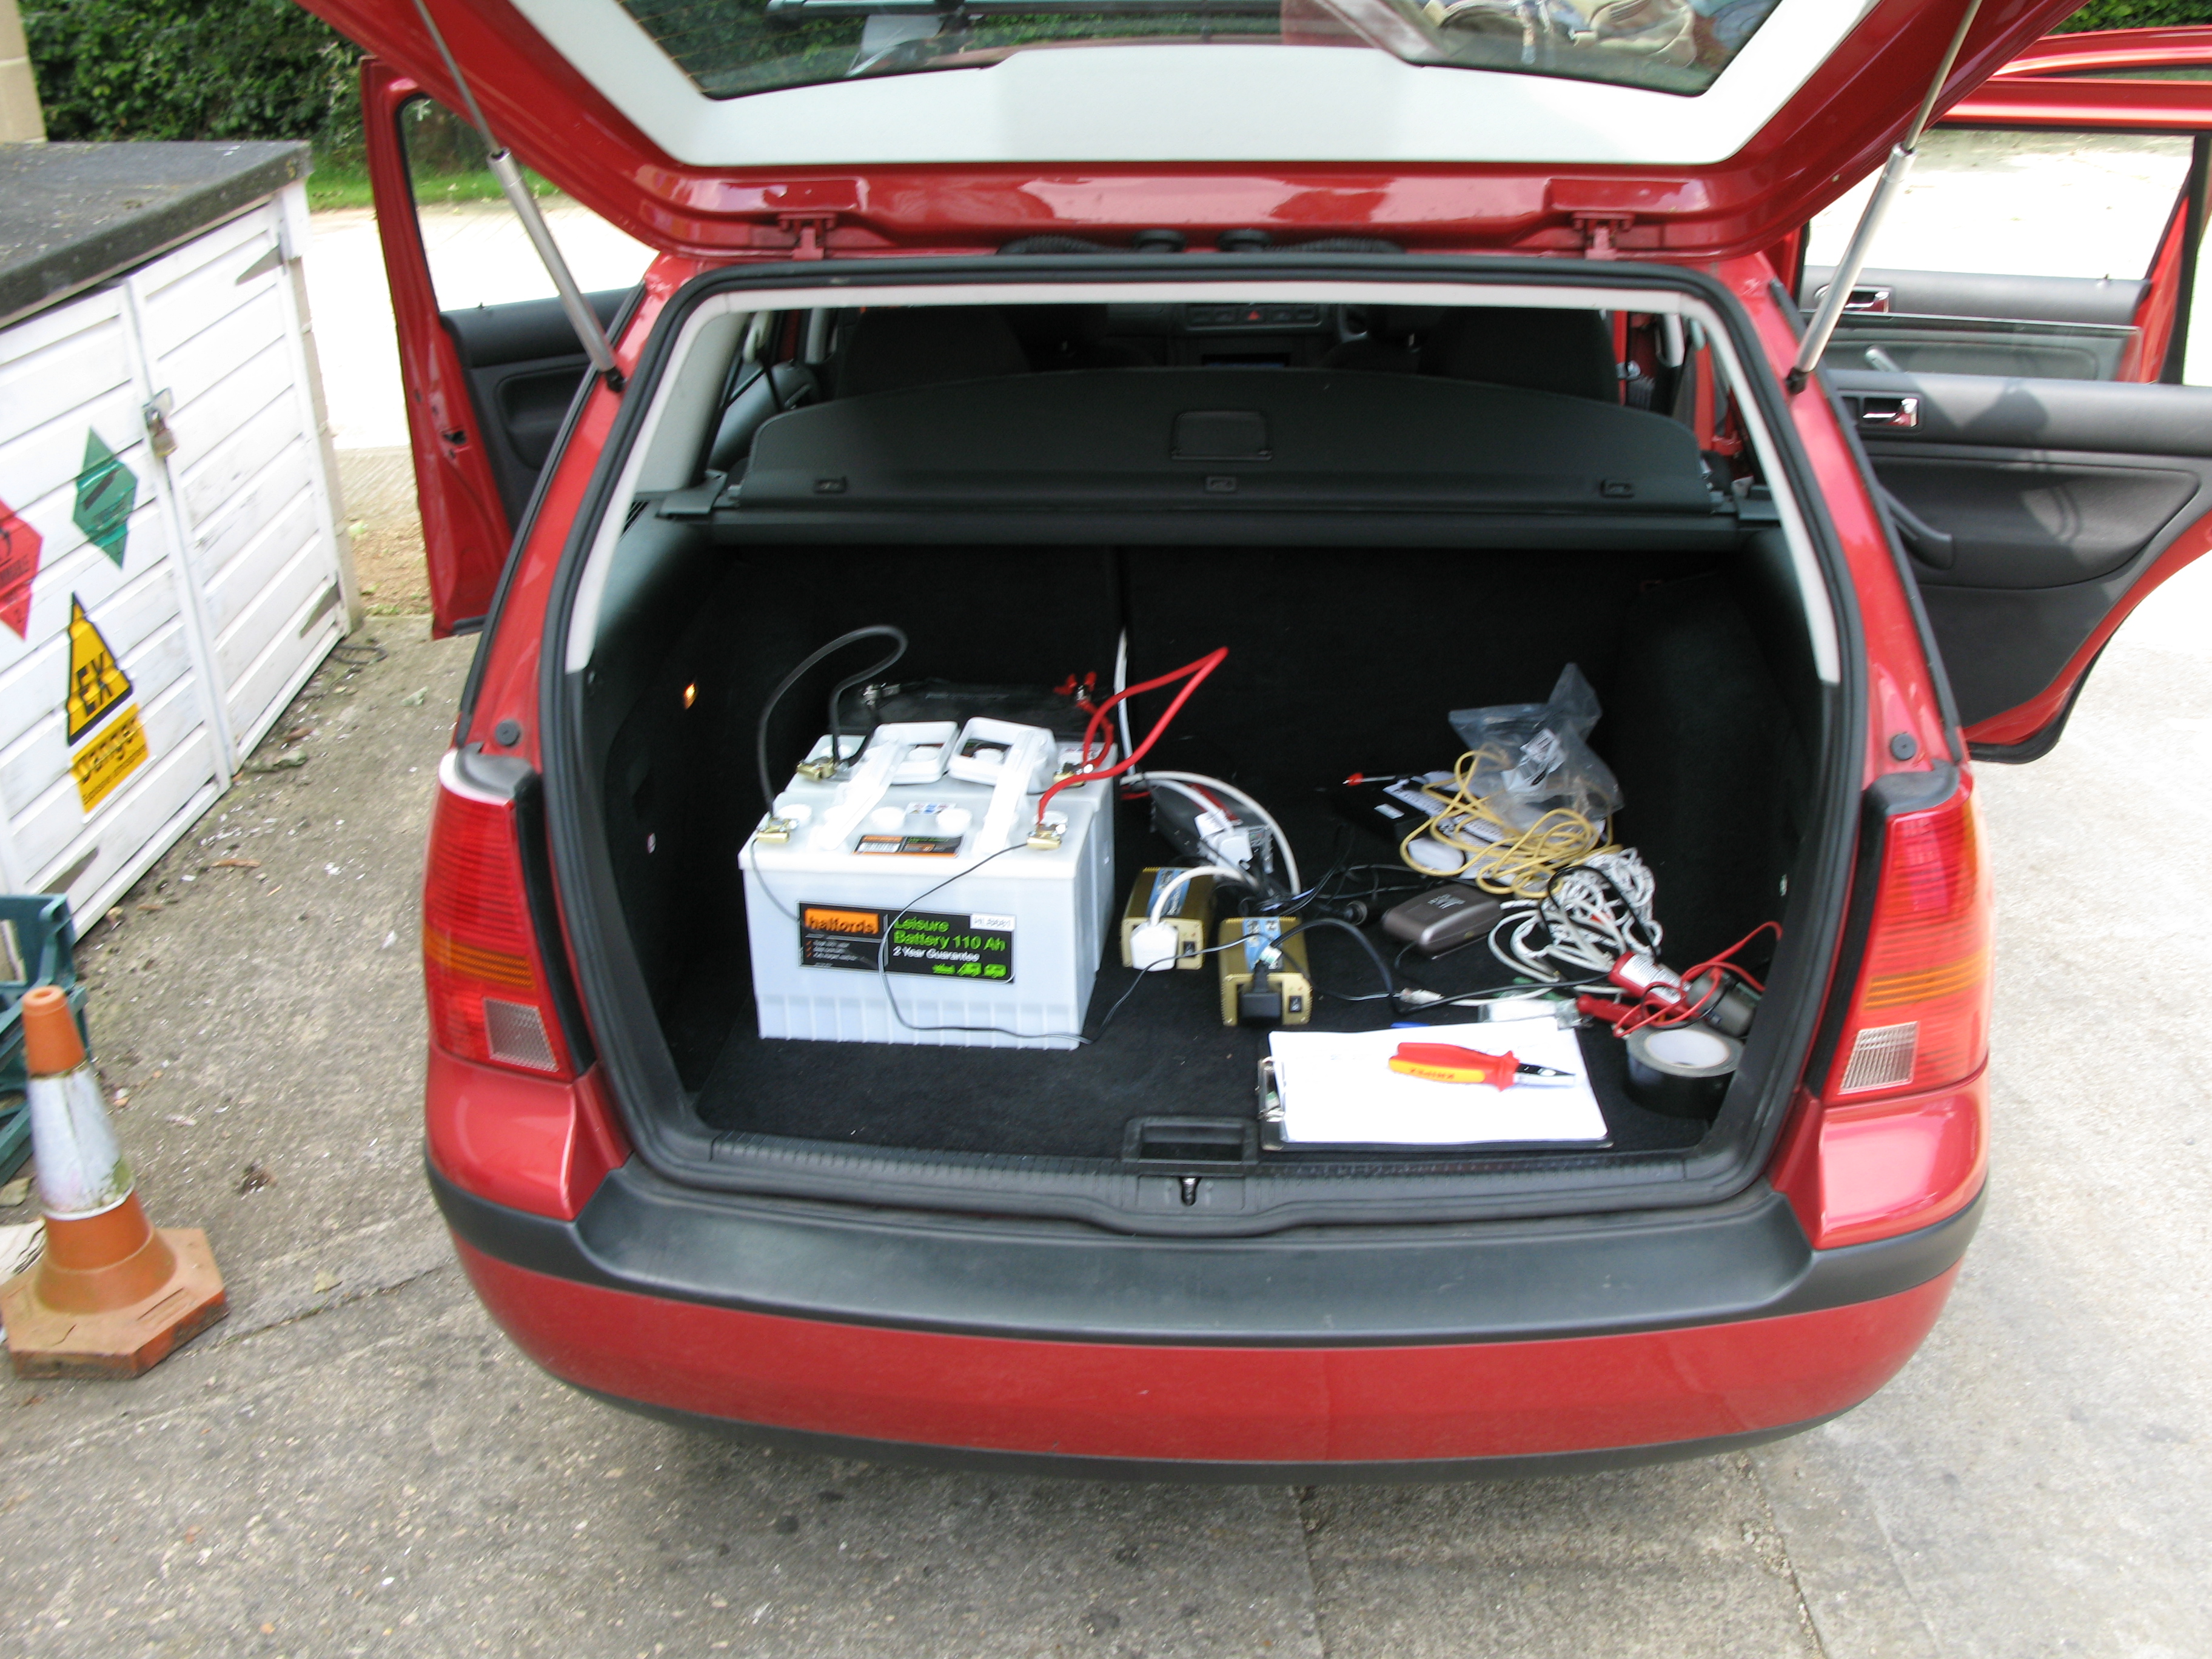
To get a larger power budget, you have relatively few options. We briefly considered strapping a generator to the roof of the car. MIT did this in some early versions of their entry for the DARPA Urban Challenge (photo here), but that kind of thing raises eyebrows :-). Another option is to drill through the car’s firewall and connect directly to the car batteries. We did all this work in rented cars though, so ruled that out. (Although I’ve heard a rumour that Google did exactly this to a rental car for their initial Street View prototype). In the end we went with the least crazy option, which was a bank of deep cycle batteries. We used 350 Ah of deep cycle batteries in our final system. Expensive and a real bugger to lift in and out of the car every day, but they did the trick.
The final design of our system looked like this:
- Pointgrey Ladybug2
- Pointgrey Bumblebee
- Waterproof GPS from CSI Wireless.
- Thule roof bars and roof rack.
- Custom sensor mount made with plywood, steel bar, rope, and 80/20.
- 350 Ah of deep cycle batteries.
- Three inverters.
- Three small form factor PCs with external storage.
- One to log stereo data.
- One to log Ladybug2 data.
- And the third for the embarrassing reason that the other two machines lacked a serial port for the GPS, and I gave up trying to get a USB-to-serial converter to work under Linux. 80W of power budget spent to solve a driver issue!
- Ethernet hub.
- Powered Firewire hub.
- Set of speakers.
We had all this equipment just sitting on the back seat of the car:
External view below. If you look closely, you can also see that our first waterproofing solution consisted of a Sainsbury’s shopping bag :-)
Step 3: Complexity, Meet Reliability
So, the system works around the block. But now it has to work reliably for 1,000 km. This is where the fun really starts.
I never really appreciated the true power of Sod’s Law before working on this project. Everything goes wrong. Really everything. Hard drives failed. Inverters failed. Two motherboards failed. The equipment got soaked in an unexpected downpour and spent a weekend disassembled in a bowl of rice. We spectacularly vaporized a very thick copper wire by shorting the battery pack. And then you finally perfect it all and go driving, and realize you got no pictures because a fly died on the camera lens :)
Thermal issues were one of the biggest problems. I’ve always theoretically understood that this was an issue, but never experienced it in practice. So it was a bit of a shock when the computers in the back of the car started randomly failing once the temperatures rose. External hard drives seem especially flaky. We encountered this problem when we did our first serious experiments in mid-summer. We bought some better external drives, but by the time we were ready for a second attempt, it was mid-winter and the problem was moot anyway.
Voltage issues were also a big deal. With the cameras drawing non-trivial power over Firewire from small-form factor PCs, and the whole system running on inverters of dubious quality, you can get bitten by things that simply don’t crop up with a normal PC sitting under a desk. For example, we fried two motherboards by drawing excessive power over Firewire. We also busted a Firewire port by putting it under too much mechanical strain. (We solved both problems by buying an externally powered Firewire hub).
And then there are the problems you just can’t do anything about. Like truck splash:
The clear image at the end of the video is achieved by climbing on to the roof of the car with a cloth ;-)
Diagnosing problems in a system with many components, both software and hardware, is a protracted detective game. It’s a common experience in robotics. When you press ‘GO’ and nothing happens, it could be a bug in your C++ code, a problem with your Unix permissions, or the fact that there’s a loose connection in the camera rig ten feet above your head. And when the system randomly segfaults every eight to ten hours, good luck finding the cause of that.
One of the big debugging challenges was that, for a lot of the initial development, I was testing on my own. To test the system properly you really have to drive around, and unless you’re of a very reckless persuasion that means you can’t simultaneously debug things. I found this very limiting, so I developed the slightly ridiculous but very effective solution of attaching speakers to the PCs and piping the standard error through a text-to-speech program. This let me have a good idea how things were going on the software side, without taking eyes off the road.
Another rich cause of long development sessions was the Ladybug’s built-in auto-exposure controller. Basically, it sucks; especially when the sun is low in the sky. It’s very disappointing to drive 10km and find the images are all poorly exposed and unusable. In the end I had to hack the LadyBug and replace the hardware auto-exposure controller with custom controller which ran in software on the host PC. That isn’t a documented feature of the driver, so making it work was a long exercise in trial and error. I also discovered how hard it is to test an auto-exposure control algorithm. You write it at your desk, and then rewrite in the passenger seat :-)
Step 4: Celebrate!
Eventually, it works! You can see some result in the video at the top of this post. I really enjoyed playing with the final data. We collected omni-directional images every 4 meters based on the GPS, regardless of the speed of the car. When you play back the images they have a beautiful dreamlike quality, as you sail through town and countryside, traffic lights and traffic jams, at a lovely measured pace 15ft up in the air.
The data was pretty good in the end, you can find the results in our papers. The final experiment was on a 1,000km route. The initial idea was actually to do coast-to-coast. However, by the time we got everything working it was the middle of December, and the days were too short to drive the distances required. So we changed the plan to consist of shorter loops close to home, picking 1,000 kilometers as the goal . There’s a little Easter egg in the route if you look carefully!
The stereo data didn’t get much use before the end of my PhD, but some results were published by the group a little after I left. Sample result below.
The whole dataset is public for anyone who wants it, you can download a 70km version here. The full 1,000km version is ~1 TB, so not on the public server. (I distributed a few copies by mailing hard drives, I’m not sure about current arrangements.)
The Final Mystery
I ended up working on this project for several months, and it was a lot of fun. After all of it, there is for me one unsolved mystery: How does Google manage to avoid camera grime / fly impacts? I would really love to know!
Very nice Blog, Thank you from France. Stephane Cardarelli.